Benchmarking the Raspberry Pi 3 Model A+

Back in March, the release of the Raspberry Pi 3 Model B+—the Pi 3 B+ to its friends—brought a chance to take stock and review just how far the project had come since its launch via a series of benchmarks. Now the launch of the Raspberry Pi 3 Model A+ brings a bold claim: a dramatic drop in size, weight, and price over the Pi 3 B+, but without any loss in performance.

In other words: it’s benchmark time once again.

Continue reading

The MagPi, Issue 68

The MagPi Issue 68The launch of a hardware refresh for the low-cost yet surprisingly-capable Raspberry Pi single-board computer is always a great opportunity to take stock of how the project has progressed since its launch six years ago, and the result is this: a special cover feature for The MagPi celebrating the release of the Raspberry Pi 3 Model B+, or Pi 3 B+ to its friends.

Following roughly the same format as my cover feature for the launch of the Raspberry Pi 3 from March 2016, and my cover feature for the Pi Zero’s launch back in November 2015, my multi-page feature begins with an overview of the board highlighting its key new features with high-resolution call-out photography: the new Broadcom BCM2837B0 system-on-chip which dispenses with the old plastic package for a new direct-die layout protected by a metal heatspreader; the new dual-band 2.4GHz and 5GHz Wi-Fi and Bluetooth radio module; a Pi Zero-inspired ground plane antenna, which boosts wireless performance still further; a Power over Ethernet (PoE) header for the optional PoE HAT; gigabit Network connectivity; and a custom-designed power management integrated circuit (PMIC) which improves regulation and assists with the clockspeed increase to 1.4GHz.

Taking a brief pause for a quick getting-started guide for those new to the Raspberry Pi, the feature then gets into its stride with a full suite of benchmarks across two pages. Measuring everything from CPU and memory performance to Ethernet throughput, power draw, and Wi-Fi signal quality, the benchmarks don’t just cover the Pi 3 B+ and its immediate predecessor; the benchmarks compare the new board to every single mainstream model of Raspberry Pi in the project’s history, all the way back to the original Model B from the initial pre-production run. If you’ve ever wondered how things have improved over time, this feature will let you know exactly that.

A further two pages are taken up by my interview with Raspberry Pi Foundation co-founder Eben Upton, who first introduced me to the project all those years ago. Diving into the changes and improvements made in the Pi 3 B+’s design, which is the work of engineer Roger Thornton, the interview also includes several behind-the-scenes images and – because I can never resist the opportunity – a thermal imaging analysis demonstrating how the new packaging and thicker PCB help the Pi 3 B+ deal with heat dissipation, despite its faster clock speed compared to the hot-running Pi 3.

To read through the full feature, which also includes a more detailed getting-started guide and ten project ideas which take advantage of the board’s increased power, head to your local newsagent, supermarket, or download the issue digitally under the permissive Creative Commons licence from the official website.

Benchmarking the Raspberry Pi 3 B+

Raspberry Pi 3 B+

The launch of the shiny new Raspberry Pi 3 B+ offers a chance to revisit the entire history of the Pi family, benchmarking each device in turn from the original Raspberry Pi Model B launch board with its somewhat limited 256MB of RAM right through to the shiniest and newest board. This post collates the results from a range of different benchmarks, demonstrating how the power of the Pi has changed over the years.

If attempting to replicate the results yourself, there is one key fact to note: the Raspberry Pi has enjoyed somewhere in the range of a 30 percent performance uplift in the last couple of years through software and firmware optimisation alone; comparing the same benchmark run on a Pi using the latest Raspbian operating system today with results gathered a year or more ago will give a false reading, which is why all these results have been gathered using the same firmware and software revision.


Continue reading

Custom PC, Issue 166

Custom PC Issue 166Readers of my regular Hobby Tech column this month will find a BBC micro:bit-driven tutorial alongside two reviews covering the remarkable Raspberry Pi Zero W microcomputer and the fascinating Delete by Paul Atkinson.

The idea for the tutorial came about while working on a chapter of my upcoming Micro:bit User Guide, and seemed like a perfect fit for the readers of Custom PC Magazine: turning the low-cost yet extremely flexible micro:bit into an addressable USB-connected 5×5 LED matrix and having it display current CPU load in a constantly-updating bar graph. Naturally, the same technique could be used to graph almost anything.

The secret lies in MicroPython’s REPL, an interactive interpreter which can run on the micro:bit and accept commands via the USB serial port. By switching the micro:bit into REPL mode, it can be slaved to another system over USB. The result: the entire program code, written in Python using the serial, time, and psutil libraries, exists purely on the host machine. A quick bit of Blu-tack later, and my monitor was wearing a CPU monitor which worked even when the display was off.

The Pi Zero W, meanwhile, was a device to which I had been looking forward for quite some time. An upgraded version of the original £5 Raspberry Pi Zero microcomputer, the Pi Zero W differs in only one respect: it has a built-in radio module, the same BCM43438 as found on the far larger and more expensive Raspberry Pi 3.

While the addition of the radio module, which offers Bluetooth, Bluetooth Low Energy, and 2.4GHz Wi-FI connectivity, almost doubles the price of the Pi Zero W to £9.60, it’s money well spent. In almost every Pi Zero project I have built, I’ve ended up using a USB OTG adaptor and low-cost USB Wi-Fi dongle to add network connectivity, and having it on-board – even at a slightly higher cost compared to a USB-connected solution – makes life considerably easier.

Finally, Delete. Billed as “a design history of computer vapourware,” Paul Atkinson’s coffee table book is packed with high-quality photographs – and, for the rarer machines, the occasional rescaled JPEG exhibiting unfortunate compression artefacts – covering machines from an upgraded Sinclair QL to a bright yellow IBM that never left the drawing board. Each comes with pages on its history, with interview subjects detailing features and failures alike, and while not all machines were strictly vapourware few are likely to have a place in the average vintage computing collection. In short: if you like old computers you’ll like Delete, which is available now from Amazon and other bookstores under ISBN 978-0857853479.

As always, you can read the whole column and a whole lot more by picking up Custom PC Issue 166 from your nearest supermarket, newsagent, or electronically via Zinio and similar services.

PC & Tech Authority, Issue 232

PC & Tech Authority Issue 232This month’s PC & Tech Authority includes a reprint of a review I originally wrote for PC Pro Magazine, in which I turn my eye to the Kano Computer Kit, the latest bundle of parts from the eponymous London-based education-centric company – and here’s what I had to say at the time of the original review.

The original Kano kit proved a smash hit when it landed on crowdfunding site Kickstarter back in 2013, raising more than $1.5 million to produce what it claimed was a computer you built yourself. Its launch was marred, however, by a modicum of controversy: what Kano had made was not a computer, but rather a selection of accessories – case, speaker, keyboard, and a customised GNU/Linux operating system – which it bundled with the already-existing Raspberry Pi, turning it from the “computer you build” to the “computer you put in a case and plug a USB dongle into.”

The crowdfunding success was followed by efforts to set up a sustainable business, and the Kano kits are now available globally direct from Kano and through resellers. For review I received the two latest revisions, the Kano Computer Kit and Kano Display Kit, bundled together as the Kano Complete Computer Kit.

The Computer Kit takes a Raspberry Pi 3 then bundles it with the Debian-based Kano OS software, a case, GPIO-powered speaker, combined wireless keyboard and trackpad in fetching orange, and the Kano ‘story book’ manual. The Display Kit adds a non-touch display panel, a custom stand the Kano case can hook into, and a smart split power cable that allows the display and Raspberry Pi to be driven from a single socket.

The hardware, sadly, proved disappointing for the cost. At an RRP of £299, the kit isn’t exactly value for money: a Raspberry Pi 3, speaker, wireless keyboard and trackpad, official touchscreen display, power supply, micro-SD card, and a decent book could be had for around half the cost and provide roughly equal educational value – if, that is, you ignore the software.

Kano OS is, to put it simply, fantastic. For full details you’ll have to read my review, but it’s fair to say I was in love with the platform from the moment I powered the Kano kit on. Interestingly, though, you don’t need a Kano kit to use Kano OS: the Debian-based Linux distribution is available to download completely free of charge from Kano’s developer site, and can be used on any existing Raspberry Pi.

For my final conclusion, pick up the latest issue of PC & Tech Authority from your favourite supermarket, newsagent, or electronically via Zinio and similar digital distribution platforms.

PC Pro, Issue 269

PC Pro Issue 269In this month’s PC Pro I turn my eye to the Kano Computer Kit, the latest bundle of parts from the eponymous London-based education-centric company – and come away with distinctly mixed feelings.

The original Kano kit proved a smash hit when it landed on crowdfunding site Kickstarter back in 2013, raising more than $1.5 million to produce what it claimed was a computer you built yourself. Its launch was marred, however, by a modicum of controversy: what Kano had made was not a computer, but rather a selection of accessories – case, speaker, keyboard, and a customised GNU/Linux operating system – which it bundled with the already-existing Raspberry Pi, turning it from the “computer you build” to the “computer you put in a case and plug a USB dongle into.”

The crowdfunding success was followed by efforts to set up a sustainable business, and the Kano kits are now available globally direct from Kano and through resellers. For review I received the two latest revisions, the Kano Computer Kit and Kano Display Kit, bundled together as the Kano Complete Computer Kit.

The Computer Kit takes a Raspberry Pi 3 then bundles it with the Debian-based Kano OS software, a case, GPIO-powered speaker, combined wireless keyboard and trackpad in fetching orange, and the Kano ‘story book’ manual. The Display Kit adds a non-touch display panel, a custom stand the Kano case can hook into, and a smart split power cable that allows the display and Raspberry Pi to be driven from a single socket.

The hardware, sadly, proved disappointing for the cost. At an RRP of £299, the kit isn’t exactly value for money: a Raspberry Pi 3, speaker, wireless keyboard and trackpad, official touchscreen display, power supply, micro-SD card, and a decent book could be had for around half the cost and provide roughly equal educational value – if, that is, you ignore the software.

Kano OS is, to put it simply, fantastic. For full details you’ll have to read my review, but it’s fair to say I was in love with the platform from the moment I powered the Kano kit on. Interestingly, though, you don’t need a Kano kit to use Kano OS: the Debian-based Linux distribution is available to download completely free of charge from Kano’s developer site, and can be used on any existing Raspberry Pi.

For my final conclusion, pick up the latest issue of PC Pro from your favourite supermarket, newsagent, or electronically via Zinio and similar digital distribution platforms.

Custom PC, Issue 162

Custom PC Issue 162In Hobby Tech this month I take a look at the new Raspberry Pi-based Kano Complete Computer Kit, the eight-bit Arduboy handheld games console, and the undeniably impressive Mirobot educational robot.

To look at the Mirobot first, it’s no secret that I was eager to put it through its paces. Turtle-style robots, which roll around the floor drawing pictures, were immensely popular in the 80s, and the Mirobot looks to bring the technology bang up to date. Entirely open source, from the circuits to the software, the Mirobot is based around two microcontrollers: an Arduino, which handles the actual robotics, and an ESP8266, which provides Wi-Fi connectivity and handles the user interface and ever-so-smart over-the-air (OTA) flashing capabilities.

The Mirobot screams smart from the moment you open the package: its body is made from laser-cut MDF, and the panels form the packaging itself. Everything is put together without tools, and getting up and running requires no software installation – just a device with a modern browser. Multiple programming languages are available, and an API for those who want to roll their own software. In short, I’m a Mirobot fan – and I’d heartily recommend picking one up if you’ve an interest in open-source robotics or programming for education.

The Kano Complete Computer Kit, on the other hand, comes at education from a very different perspective. Billed somewhat disingenuously as a computer you ‘build,’ the kit is at its heart a speaker and case for a bundle Raspberry Pi alongside a customised operating system which is the project’s true selling point.

The Kano kits have been around for a while now, but the Complete Computer Kit as reviewed is new: the computer side has been refreshed to include the latest Raspberry Pi 3, while the bundle also includes a high-quality but non-touch display which accepts the Kano-cased Pi in its rear. It’s a lovely kit, and the software – which you can download for free and run on your own Raspberry Pi – is phenomenal, but its cost definitely lets it down: at £299 RRP it’s massively overpriced.

Finally, the Arduboy. Crowdfunded and hit by numerous delays on its way to market, the Arduboy is an extremely smart little handheld console based around an Arduino-compatible ATmega microprocessor. Games are written in the Arduino IDE then flashed onto the credit card sized device via USB, and play out on a teeny-tiny little single-colour OLED panel which is sadly prone to bad banding.

The Arduboy is a lovely device, but it’s not the first design I’ve seen – and nor is it my favourite. The Gamebuino, reviewed back in Issue 134, still sits at the top for a number of reasons: it’s cheaper, it has better battery life, and it has a clever system for loading games from a bundled micro-SD card. The Arduboy, by contrast, is slimmer, has a clearer display, but can only carry a single game at a time. When you want to switch games, you’ll need a computer with the Arduino IDE – and that’s a major drawback in a portable gaming device.

All this can be yours, alongside the usual raft of interesting things written by people who aren’t me, at your nearest newsagent, supermarket, or from the comfort of wherever you are now via Zinio and similar digital distribution services.

The Raspberry Pi User Guide, Fourth Edition

Raspberry Pi User Guide Fourth EditionWriting a book on a technical topic is like trying to nail fog. The more popular a topic is the faster it moves and the thinner the fog gets. Nowhere is this more true than the Raspberry Pi, which this month celebrated shipping its ten millionth single-board computer to makers, educators, hackers, tinkerers, and curious types worldwide. Accordingly, The Raspberry Pi User Guide was in need of an overhaul – and an overhaul it has indeed received.

The fourth edition of my best-selling guide to all things Pi now includes coverage of the Raspberry Pi 3 with its Bluetooth and Wi-Fi radios, an entire chapter on choosing and using add-ons including the official Raspberry Pi Touchscreen, Sense HAT, and Wi-Fi adapter, a completely rewritten guide to Raspbian which covers the latest changes to the distribution, and a shift in other chapters to cover more popular software including LibreOffice – now a default install option – and the OSMC media software.

Elsewhere, you’ll find things tweaked, polished, and brought bang-up-to-date. The networking instructions now cover the use of the DHCP configuration file for setting a static IP address, the GPIO chapter is refreshed, and you’ll even find instructions for correctly soldering GPIO headers onto the ultra-low-cost Raspberry Pi Zero.

For UK readers, The Raspberry Pi User Guide Fourth Edition is available to purchase now from Amazon; for international readers, check with your local booksellers or find links to other outlets via the official Wiley book listing.

The MagPi, Issue 49

The MagPi Issue 49
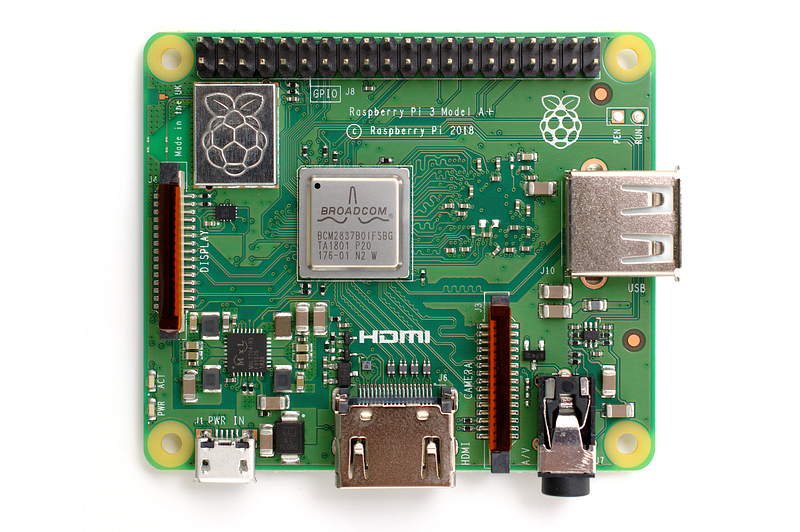
The latest issue of The MagPi, the official magazine of the Raspberry Pi Foundation, includes my two-page interview with Grant Macaulay of Theo Lasers, along with what is now rapidly becoming a go-to image I took of a Raspberry Pi 3 artfully rotated and pasted onto the cover.

I first met Grant at the Maker Faire UK event earlier this year, and got talking to him about the project he had quit his job to build: Theo Lasers. Designed to address the lack of affordable entry-level laser cutters and engravers for hobbyist and educational use, Theo Lasers came from a simple idea: “I’m going to make a laser cutter with a laser cutter,” he laughingly explained in front of a stand of prototypes proving he could do just that.

In the months since the event, Grant has been hard at work improving upon his design. In particular, with the aid of a developer friend, he’s moved from basing the hardware on an Arduino Mega microcontroller to using a Raspberry Pi Zero. In doing so his team developed Theo Controller, a browser-based control and monitoring system which runs entirely on the Pi and which can accept input from any web-compatible device. Coupled with an on-board display, SD card reader, and even the ability to run from battery or solar power, and Grant’s design definitely stands out from the competition even before you see its eye-catching wooden chassis.

Grant’s due to launch a Kickstarter campaign to begin mass production of the Theo Laser cutters in early September, with more details available from the official website. The interview, meanwhile, can be read for free in the Creative Commons licensed The MagPi Issue 49, out now.

Custom PC, Issue 153

Custom PC Issue 153My regular Hobby Tech column celebrates its third year this month, and I’d like to think it does so in style. As well as a two-page review of the Raspberry Pi 3, the column details how to build a Raspberry Pi Zero-based energy usage graph into a cheap box frame and interviews Raspberry Pi Foundation director of hardware James Adams about his designs and inspiration.

First, the Pi 3. I’ve previously written about the board in a cover feature for The MagPi and in Linux User & Developer, so there should be no major surprises in this review – beyond a focus more on the hobbyist community’s desires and concerns, given the title of the column. The interview, though, is all-new: a small, separate extract of my interview was published in The MagPi’s Raspberry Pi 3 launch issue, but the material used in Hobby Tech is fresh – including detailed information on just how that Wi-Fi and Bluetooth radio module talks to the new BCM2837 SoC and the challenges of conformance testing something that has an intentional radio emitter inside.

The build was a project I worked on after picking up a cheap electricity and gas monitor for my house. While the website works well for viewing live usage and historical graphs, I wanted something that wouldn’t look out of place in the living room and hopefully remind everyone to turn things off when they leave! A cheap Raspberry Pi Zero was the perfect platform, and combine with a Pimoroni Unicorn HAT fits snugly in the back of a wooden box frame. Some paper on the front diffuses the LEDs to prevent glare and make it look less like a hack and more like a piece of furniture – though with the consequence that the photos look a little washed out compared to the bright, colourful display in the flesh – and everything else is a software concern.

All this, and interesting things written by people who aren’t me, is available from your local supermarket, newsagent, or electronically via Zinio and similar services.