Custom PC, Issue 229

Custom PC Issue 229For my Hobby Tech column in this month’s Custom PC Magazine I’ve taken a look at the Blink smart-home security camera ecosystem, and in particularly its new doorbell camera, the shiny Raspberry Pi Pico W, and built a custom Linux distribution for the Microchip PolarFire SoC Icicle Kit.

My interest in the Blink ecosystem is not purely academic. Having recently purchased a new house, I saw the opportunity to deploy a cost-effective camera system while documenting the process for Hobby Tech – and I’m pleased to report that Blink, which is entirely battery-driven bar a mains-powered “Sync Module, made things easy. The hardware was initially photographed in my studio then installed on-site with additional imagery captured, before being tested over a period of weeks to iron out teething problems.

The Raspberry Pi Pico W, meanwhile, is a near-identical clone of the Raspberry Pi Pico microcontroller board – but this time it’s brought a radio along for the ride. At the time of writing, only Wi-Fi was available – with Bluetooth present in hardware but not yet enabled in the firmware – but that’s enough to vastly expand the possibilities for projects driven by the Raspberry Pi Pico and its RP2040 microcontroller. Better still, the price has been kept low: at £6 including VAT, it’s near-impossible not to recommend the Raspberry Pi Pico W.

Finally, I reviewed the PolarFire SoC Icicle Kit back in Issue 224 – and one of my biggest complaints was with the pre-installed Linux distribution, which was extremely spartan and not a little buggy. It may have only been five months since that review was published, but things have change for the better – and to prove it I used Microchip’s documentation and Yocto Linux board support package (BSP) to build a much more polished Linux operating system for the board.

All this and more is available at your nearest newsagent or supermarket, online with global delivery, or as a free download on the official website.

Benchmarking the Raspberry Pi 3 Model A+

Back in March, the release of the Raspberry Pi 3 Model B+—the Pi 3 B+ to its friends—brought a chance to take stock and review just how far the project had come since its launch via a series of benchmarks. Now the launch of the Raspberry Pi 3 Model A+ brings a bold claim: a dramatic drop in size, weight, and price over the Pi 3 B+, but without any loss in performance.

In other words: it’s benchmark time once again.

Continue reading

Custom PC, Issue 162

Custom PC Issue 162In Hobby Tech this month I take a look at the new Raspberry Pi-based Kano Complete Computer Kit, the eight-bit Arduboy handheld games console, and the undeniably impressive Mirobot educational robot.

To look at the Mirobot first, it’s no secret that I was eager to put it through its paces. Turtle-style robots, which roll around the floor drawing pictures, were immensely popular in the 80s, and the Mirobot looks to bring the technology bang up to date. Entirely open source, from the circuits to the software, the Mirobot is based around two microcontrollers: an Arduino, which handles the actual robotics, and an ESP8266, which provides Wi-Fi connectivity and handles the user interface and ever-so-smart over-the-air (OTA) flashing capabilities.

The Mirobot screams smart from the moment you open the package: its body is made from laser-cut MDF, and the panels form the packaging itself. Everything is put together without tools, and getting up and running requires no software installation – just a device with a modern browser. Multiple programming languages are available, and an API for those who want to roll their own software. In short, I’m a Mirobot fan – and I’d heartily recommend picking one up if you’ve an interest in open-source robotics or programming for education.

The Kano Complete Computer Kit, on the other hand, comes at education from a very different perspective. Billed somewhat disingenuously as a computer you ‘build,’ the kit is at its heart a speaker and case for a bundle Raspberry Pi alongside a customised operating system which is the project’s true selling point.

The Kano kits have been around for a while now, but the Complete Computer Kit as reviewed is new: the computer side has been refreshed to include the latest Raspberry Pi 3, while the bundle also includes a high-quality but non-touch display which accepts the Kano-cased Pi in its rear. It’s a lovely kit, and the software – which you can download for free and run on your own Raspberry Pi – is phenomenal, but its cost definitely lets it down: at £299 RRP it’s massively overpriced.

Finally, the Arduboy. Crowdfunded and hit by numerous delays on its way to market, the Arduboy is an extremely smart little handheld console based around an Arduino-compatible ATmega microprocessor. Games are written in the Arduino IDE then flashed onto the credit card sized device via USB, and play out on a teeny-tiny little single-colour OLED panel which is sadly prone to bad banding.

The Arduboy is a lovely device, but it’s not the first design I’ve seen – and nor is it my favourite. The Gamebuino, reviewed back in Issue 134, still sits at the top for a number of reasons: it’s cheaper, it has better battery life, and it has a clever system for loading games from a bundled micro-SD card. The Arduboy, by contrast, is slimmer, has a clearer display, but can only carry a single game at a time. When you want to switch games, you’ll need a computer with the Arduino IDE – and that’s a major drawback in a portable gaming device.

All this can be yours, alongside the usual raft of interesting things written by people who aren’t me, at your nearest newsagent, supermarket, or from the comfort of wherever you are now via Zinio and similar digital distribution services.

The MagPi, Issue 53

The MagPi Issue 53Inside this month’s MagPi Magazine – the first issue to feature a cover-mounted DVD, boasting a bootable copy of the new Debian+Pixel Linux distribution for readers to try – you’ll find my review of a rather special little gadget: the Mirobot v2 programmable robot.

I’ve played with educational robots before, but the Mirobot caught my eye the minute I saw inventor Ben Pirt demonstrating it at the Maker Faire UK earlier this year. With a chassis made entirely from laser-cut MDF, the Mirobot is an impressive package: Ben has designed it so that every component nestles in holes cut out from the MDF sheets themselves, making for an extremely compact box which pops nicely through your letterbox and leaving almost zero waste once assembled.

The Mirobot is designed primarily for use as a turtle, and includes a mount for a pen so it can draw on suitable surfaces. Where it differs from most rival designs is that it can be programmed entirely through a browser: an on-board web server, running on the popular ESP8266 microcontroller, can work as a standalone hotspot with simple Scratch-inspired drag-and-drop programming interface or connect to your home Wi-Fi and allow access to additional languages, a point-and-click interface, and even a set of buttons for direct remote control.

With the exception of the Scratch language, which relies on Adobe Flash Player, everything works an absolute treat on the Raspberry Pi, but the Mirobot isn’t limited to this: it can be programmed from any modern web-connected device, from a laptop to a smartphone, or for more advanced users interfaced with via a well-documented application programming interface (API) from the language of your choice. Assembly is quick and easy, requiring absolutely no tools, and while aligning the pen and motors is a little trickier that’s a one-off job.

To read the full review, either pick up a paper copy of The MagPi Issue 53 and enjoy your bonus cover DVD or download the entire issue for free under the Creative Commons licence from the official website.

The Raspberry Pi User Guide, Fourth Edition

Raspberry Pi User Guide Fourth EditionWriting a book on a technical topic is like trying to nail fog. The more popular a topic is the faster it moves and the thinner the fog gets. Nowhere is this more true than the Raspberry Pi, which this month celebrated shipping its ten millionth single-board computer to makers, educators, hackers, tinkerers, and curious types worldwide. Accordingly, The Raspberry Pi User Guide was in need of an overhaul – and an overhaul it has indeed received.

The fourth edition of my best-selling guide to all things Pi now includes coverage of the Raspberry Pi 3 with its Bluetooth and Wi-Fi radios, an entire chapter on choosing and using add-ons including the official Raspberry Pi Touchscreen, Sense HAT, and Wi-Fi adapter, a completely rewritten guide to Raspbian which covers the latest changes to the distribution, and a shift in other chapters to cover more popular software including LibreOffice – now a default install option – and the OSMC media software.

Elsewhere, you’ll find things tweaked, polished, and brought bang-up-to-date. The networking instructions now cover the use of the DHCP configuration file for setting a static IP address, the GPIO chapter is refreshed, and you’ll even find instructions for correctly soldering GPIO headers onto the ultra-low-cost Raspberry Pi Zero.

For UK readers, The Raspberry Pi User Guide Fourth Edition is available to purchase now from Amazon; for international readers, check with your local booksellers or find links to other outlets via the official Wiley book listing.

Custom PC, Issue 157

Custom PC Issue 157This month’s Hobby Tech column demonstrates how to use the Raspberry Pi Camera Module to create smooth timelapse footage and reviews the WeMos D1 R2 ESP8266-based Arduino-alike board and Andrew ‘bunnie’ Huang’s Essential Guide to Electronics in Shenzhen.

Looking to the tutorial, this is far from the first time I’ve covered the use of the Raspberry Pi Camera Module add-on. Since its initial launch, however, the software has come on in leaps and bounds including means of finally addressing a longstanding issue with the board: the difficulty in using the timelapse functionality. Where previously you needed a surprisingly complicated script to control the camera, now timelapse capture is handled entirely within the raspistill software. Coupled with avconv – ffmpeg, which I had previously recommended for the task, having been deleted from the Raspbian software repositories – the two packages are all you need to create high-quality timelapse footage directly on any Raspberry Pi.

The WeMos D1 R2 is one of a range of low-cost devices based on the ESP8266 microcontroller and Wi-Fi radio. While getting on in age, the ESP8266 is extremely popular due to its rock-bottom pricing; the only snag being that its form factor makes it difficult to integrate into hobbyist projects. The WeMos D1 R2 aims to fix that by providing a breakout board for the compact ESP8266 in the familiar Arduino Uno layout. While more feature-packed equivalents exist, the WeMos D1 R2 costs just £3.30 in single units – an absolute bargain for an easy-to-use microcontroller with integrated Wi-Fi connectivity.

Finally, The Essential Guide to Electronics in Shenzhen. Kindly loaned by my friend Aaron at hobbyist electronics specialist oomlout, this latest book from noted hacker Andrew ‘bunnie’ Huang is a major departure from the norm. Rather than a how-to guide or white paper analysis, the book is designed to be used as a functional sourcing tool while visiting the Shenzhen area of China complete with maps, point-to-translate pages covering everything from travelling back to your hotel to enquiring as to the tolerance of resistors and capacitors. A pair of prose sections also provide information on doing business in China, including how to spot fake or missold components and how each could affect your project. Niche, perhaps, but a fascinating read – and an invaluable tool for anyone planning a trip to Shenzhen any time soon.

All this, plus the usual raft of interesting things written by people who aren’t me, can be found at your local newsagent, supermarket, or as a string of zeroes and ones on Zinio and other digital distribution services.

Custom PC, Issue 155

Custom PC Issue 155This month’s Hobby Tech column features my field report from the Maker Faire UK 2016 event, an interview with my good friend Daniel Bailey about his brilliant homebrew computers, and a review of the Genuino MKR1000 microcontroller.

First, the event. Attending events like the Maker Faire is always a blast, especially as press when you have an excuse to stick your nose into absolutely everything that’s happening. My attendance this year was sponsored by oomlout, a local hobbyist electronics shop and a client for whom I do blog work, as highlighted in a “Sponsored By” call-out over the two-page spread. As for the event itself, you’ll find coverage of everything from DoES Liverpool’s excellent shooting gallery to affordable laser cutters and even the world’s only crowd-funded and wholly amateur manned space programme.

The event also gave me a chance to catch up with Daniel Bailey at the York Hackspace stand, after nearly a year of trying to find a good time to interview him about his impressive homebrew computers. Built on field-programmable gate arrays (FPGAs) and inspired by the classic Manchester Baby, the 8-bit C88 and 32-bit C3232 are incredibly impressive machines – and I can think of no project that better fits with the magazine’s title!

Finally, the MKR1000. Known under the Arduino brand in the US and Genuino brand elsewhere thanks to ongoing trademark disputes, the MKR1000 is Arduino.cc’s answer to the popular Particle Photon Wi-Fi microcontrollers. Featuring a breadboard-friendly layout and integrated 2.4GHz 802.11b/g/n Wi-Fi radio, it represents an interesting new direction for the company – albeit one somewhat hobbled by a high price compared against the competition.

All this, plus the usual raft of interesting things written by people other than me, is awaiting your attention at your local newsagent, supermarket, or electronically via Zinio and similar digital distribution platforms.

Linux User & Developer, Issue 164

Linux User & Developer Issue 164
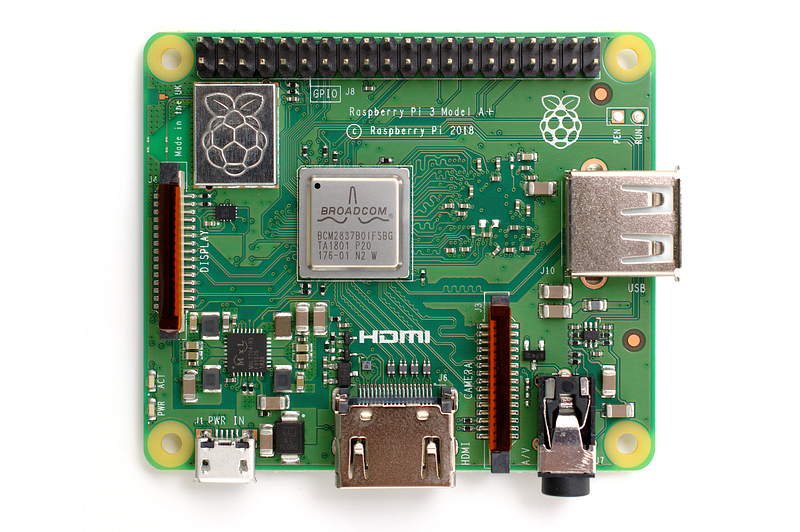
My review for this month’s Linux User & Developer magazine is of a device I’ve been playing with for a while now: the Raspberry Pi 3, the first single-board computer from the Raspberry Pi Foundation to include a 64-bit CPU and integrated radio chip.

Following my cover feature for The MagPi magazine, the Raspberry Pi 3 once again graces a magazine cover – and well it should. The switch from ARM Cortex-A7 to ARM Cortex-A53 processors cores in the new Broadcom BCM2837 system-on-chip (SoC) brings with it a considerable performance boost over the Raspberry Pi 2, which itself left the original single-core Raspberry Pi in the dust.

That’s even before discussing the integrated wireless connectivity. Boasting 2.4GHz Wi-Fi, Bluetooth 4.1, and Bluetooth Low Energy, the Raspberry Pi 3 certainly ticks a lot of boxes on the connectivity front – even if the integrated Ethernet port still communicates with the SoC through a shared single USB channel. Best of all, the board is entirely compatible with accessories and software written for earlier models – going all the way back to the early raft of add-ons for the original Raspberry Pi.

One discovery that cropped up between the MagPi launch feature and this review, though, was heat generation: testing under my thermal camera, published on imgur for the curious, revealed that the Raspberry Pi 3 gets considerably hotter than its predecessors – over 100°C under CPU load. This leads to a couple of issues: potential burns if you poke the chip and thermal throttling which dramatically harms performance if the Pi 3 is installed in a case. Coupled with even harsher throttling – from 1.2GHz to just 600MHz – when used with marginal power supplies or low-quality micro-USB cables, there are caveats aplenty.

For the full low-down, pick up a copy of Linux User & Developer Issue 164 from your nearest supermarket, newsagent, or electronically via services such as Zinio.

Custom PC, Issue 149

Custom PC Issue 149This month’s Hobby Tech has just two component parts: a long-term review of the Tenma 60W Digital Soldering Station, and a in-depth guide to building an ultrasonic distance sensor using a Spark Core for a somewhat novel application: shaming me into using my standing desk more.

Looking at the tutorial first, it all stemmed from an office move in which I bought a vast quantity of Ikea furniture. Among it all was a new desk, which for a small extra fee I was able to get with a simple hand-crank mechanism fitted to adjust its height. As I spend the vast majority of my life in front of a computer, I thought a little change like spending some of the day standing instead of sitting would do me the world of good – but, as could be expected, after an initial burst of enthusiasm I found myself using the desk in sitting mode more often than not.

This month’s project was my attempt to rectify that. Using a cheap ultrasonic distance sensor and a Spark Core microcontroller – now known as a Particle Photon, following a major rebranding exercise – I built a device which could track the distance between the surface of the desk and the ceiling and thus report whether it was in sitting or standing mode. When a mode change was detected, it would post a message to Twitter – thus publicly shaming me if I spent too long in sitting mode.

It’s a bit of a daft project, but one which demonstrates some useful techniques: it uses a resistor ladder to lower the 5V output from the ultrasonic sensor to a Spark Core-friendly 3.3V, it shows how a Wi-Fi-connected microcontroller can report readings to a remote system, and even uses If This Then That (IFTTT) to automatically post messages to Twitter based on those readings. As to whether it actually encouraged me to spend more time standing? Not so much.

As the tutorial’s complexity meant taking up a three-page spread, there was only room for one additional feature this month: a two-page long-term review of the Tenma 60W Digital Soldering Station, which I bought some time ago to replace my Maplin-branded variable-output soldering iron. Despite its surprisingly reasonable cost, purchased from the ever-reliable CPC, it’s proven a sturdy tool and is an easy recommendation for anyone looking for an entry-level upgrade from fixed-output irons. It’s also a pleasure to be able to form a long-term opinion on something: all too frequently I review items on a short-term basis, which reveals nothing about their reliability over time. Having been using the Tenma for well over a year now, though, I can personally guarantee its longevity.

All this, plus a variety of interesting things written by people who aren’t me, can be yours at your local newsagent, supermarket, or electronically via Zinio and similar digital distribution services.

Custom PC, Issue 139

Custom PC Issue 139My desk has been getting a little overloaded with new toys of late, so this month’s Hobby Tech column for Custom PC is review-heavy to help clear that backlog. While the column opens with a two-page tutorial on building a PirateBox, this is followed by a spread looking at four of Pimoroni’s Raspberry Pi add-ons with a concluding page of my thoughts on Imagination Technologies’ Creator CI20 development board.

Looking at the tutorial first, I have to admit to a little trepidation in asking my editor, Ben Hardwidge, to support something called a PirateBox. Thankfully, while its name is designed to raise eyebrows, the concept is free of anything that could reasonably enrage the copyright cartel. A PirateBox is simply a Wi-Fi router running a modified version of the OpenWRT Linux distribution, tailored for localised chat and file sharing. It has no connection to the internet, and if paired with the right low-power hardware can run for days from a cheap USB battery pack. While you could certainly use it to distribute copyright content illegitimately, the fact that you have to be in close physical proximity limits its usefulness – but it’s absolutely top-tier for sharing files at events, which is the use I had in mind when I set out to build the thing.

Pimoroni, a local company just across the way in sunny Sheffield, made a name for themselves by being one of the first to build attractive and affordable add-on boards for the Raspberry Pi. Despite being good friends with the team, I’ve never actually reviewed any of their products – until Gee Bartlett took me on a tour of the factory and pressed four of their most popular creations into my hands. So, rather than spin it out over the next four months, a two-page spread was in order to review the boards: the education-centric PiBrella, the interestingly-shaped PiGlow, the impressive Displayotron-3000, and the retina-searing Unicorn HAT. Spoiler: they’re all pretty great, and the guys are working on some more advanced projects that I can’t wait to get on the test-bench for future issues.

Finally, the Creator CI20. While it sometimes feels that all I do is test single-board computers – not that I’m complaining, they’re absolutely fascinating – the CI20 breaks from the crowd by using the MIPS instruction set architecture. The creation of Imagination Technologies – the company behind the graphics hardware that powered Sega’s ill-fated Dreamcast console, fact-fans – the board has clearly been taken from an existing oddly-shaped design but offers plenty of power for the maker community to hack around, including boasting significantly improved general-purpose performance compared to the majority of the ARM-based boards I’ve tested.

All this, plus a bunch of stuff written by people who aren’t me, can be yours with a visit to your local newsagent or supermarket, or digitally via Zinio and similar distribution services.